How to use ExoClick’s Platform API v2
ExoClick has just updated its platform API to version 2. This latest version allows you to automate every single feature inside ExoClick’s admin panel. You can use the API for simple processes such as automating repetitive tasks to save you time to more complex projects such as changing banner creatives on the fly. This blog post will show you how to use ExoClick’s API along with some automation examples to get you started right away!
Features
Both Publishers and Advertisers have a huge range of features available to them, here is a summary of what can be automated:
Advertisers
- Individual/group campaigns, variations, offers, ad formats.
- Targeting/blocking of targeting options, categories, day parting.
- Goals.
- Pull stats including adblock user data.
- Daily budget, account funding, payment types.
- Landing page name, url & traffic share algorithm.
Publishers
- Ad formats and ad zones.
- Sites, url verifications.
- Block ad types & product categories.
- Pull all stats including adblock user data.
- Bidding prices per ad format/GEO, pricing models.
- Payment types.
Before getting started
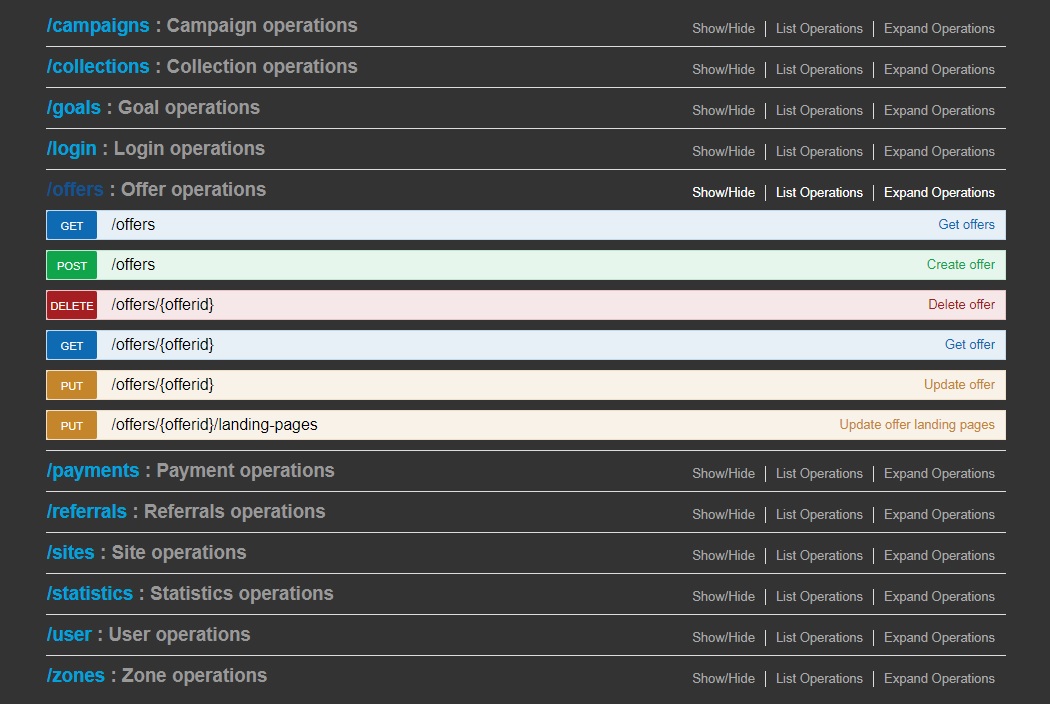
The API interface is accessible from this link and it shows a list of group titles; click on a group and all the available options will drop down.
HTTP Verbs
The API supports the following subset of HTTP verbs. Please note that not all features will support all verbs.

Let’s get started!
Setting up
In order to access restricted API requests, there must be a Session Token set. To set a token, you must have a valid ExoClick account.
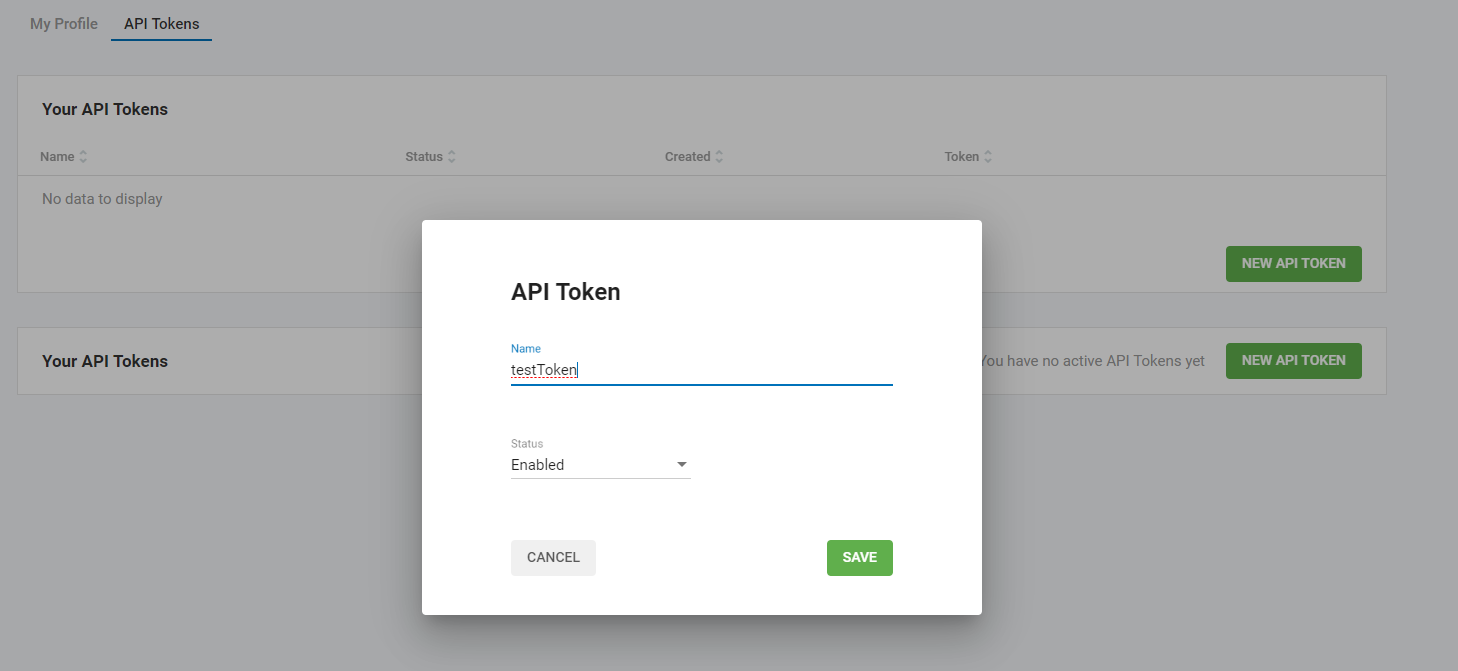
The API Token creation is available under your My Profile menu. Select API Tokens.
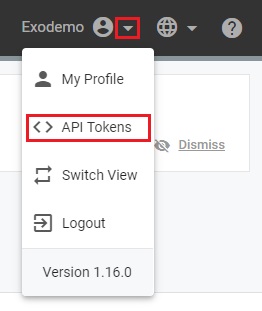
Click on New API Token.
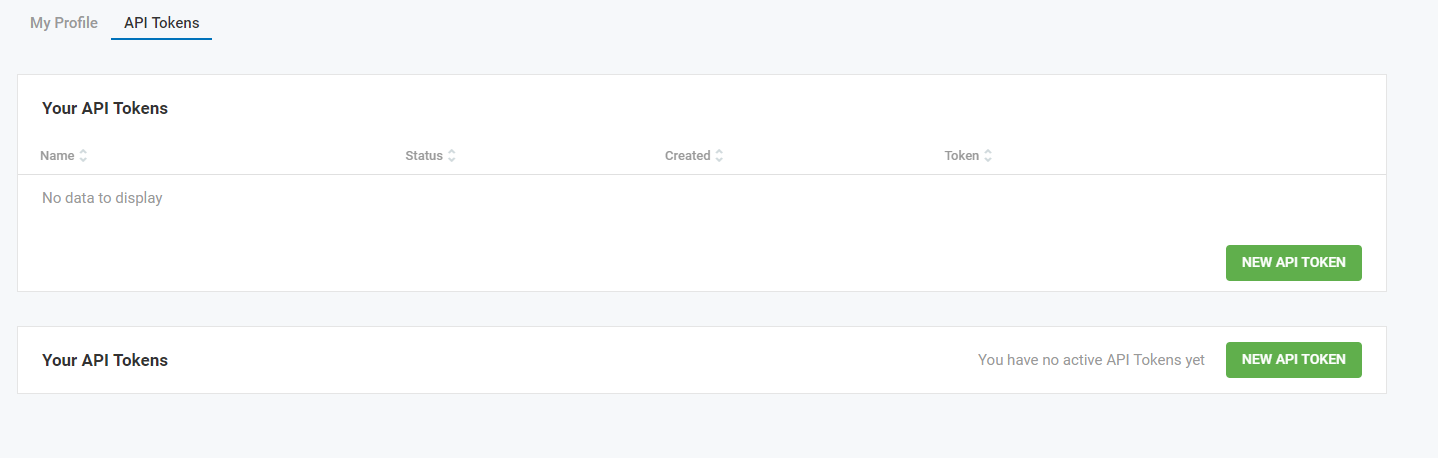
Type in the name of the Token, for this tutorial we have called ours ‘testToken’ then click Save.
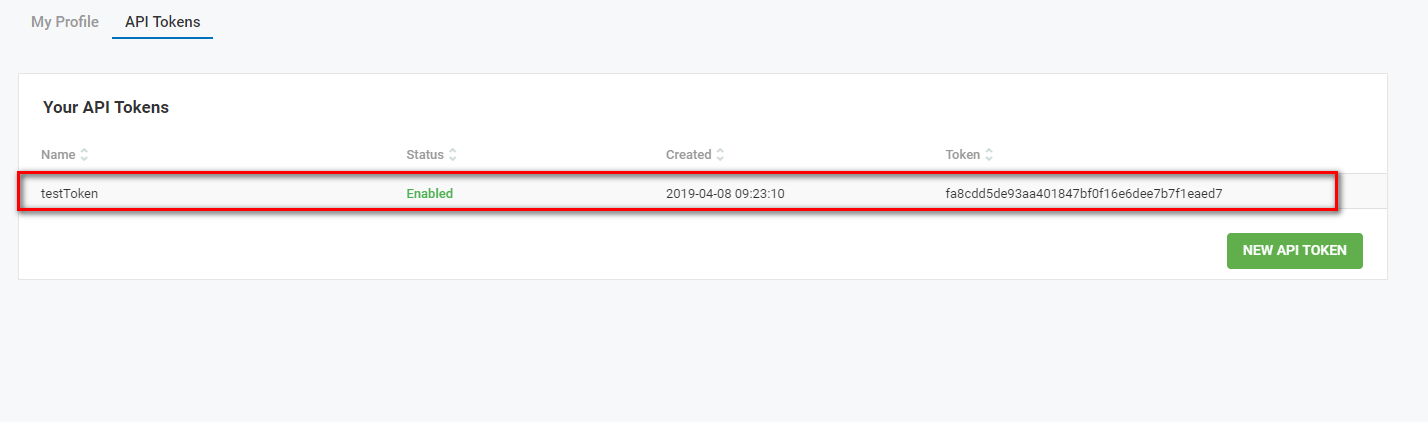
The Token id is created.
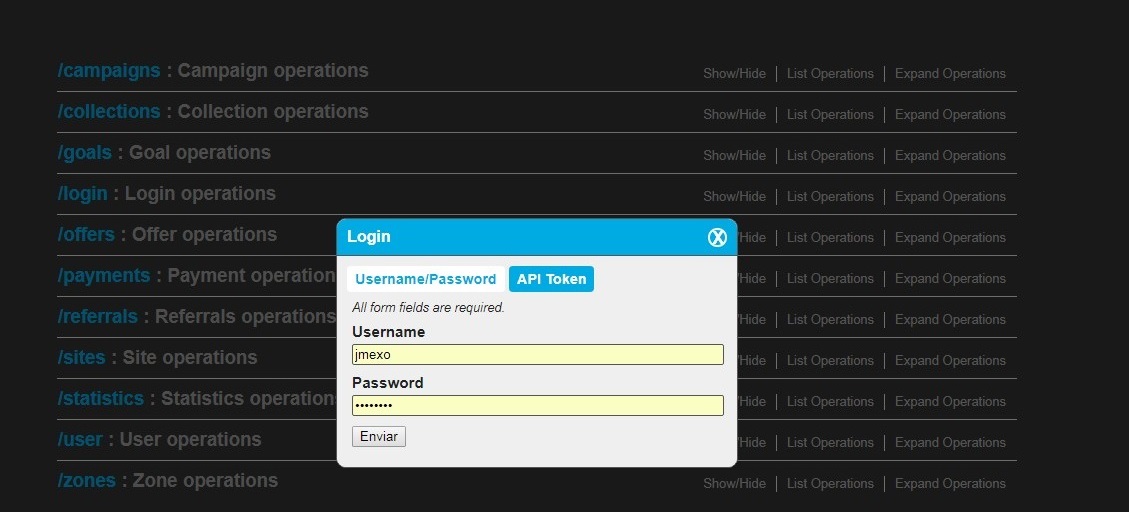
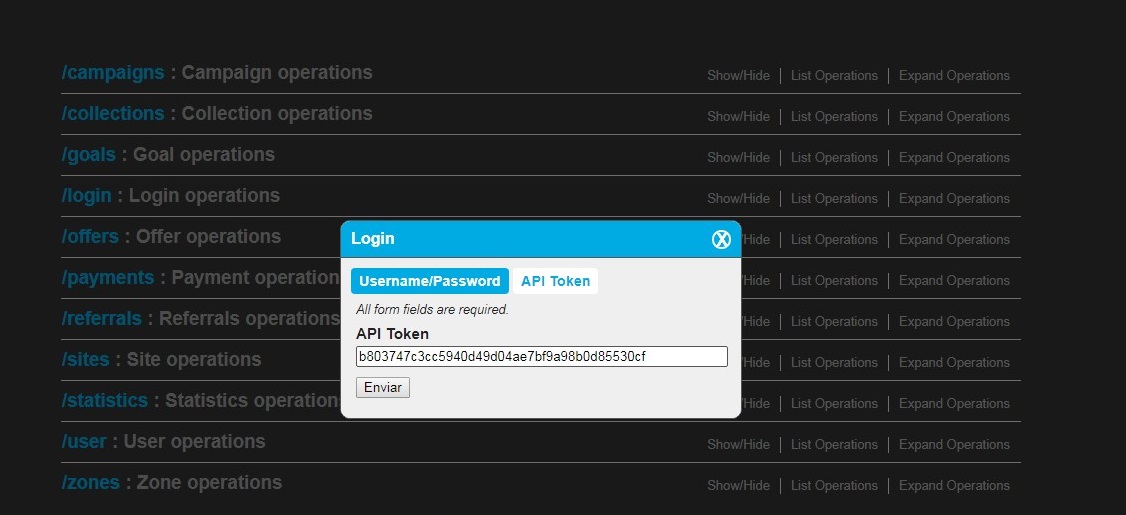
Logging in to the API
In the API interface, click on the ‘Login’ button at the top right of the screen and enter your username and password or provide an API token. Click ‘Send’ and a login request will be sent to the API to retrieve a valid session token. This token will then be used to validate all API requests you wish to make during the session.
How to make a request to the API
Lets use the example of the Campaigns group, click on it and the group will expand to list the available requests:
Click on the request you would like to automate, in this example we will request data for the CID 1923724 using:
![]()
Click on Get campaign which expands the window. Enter in the Campaign id number into the field:
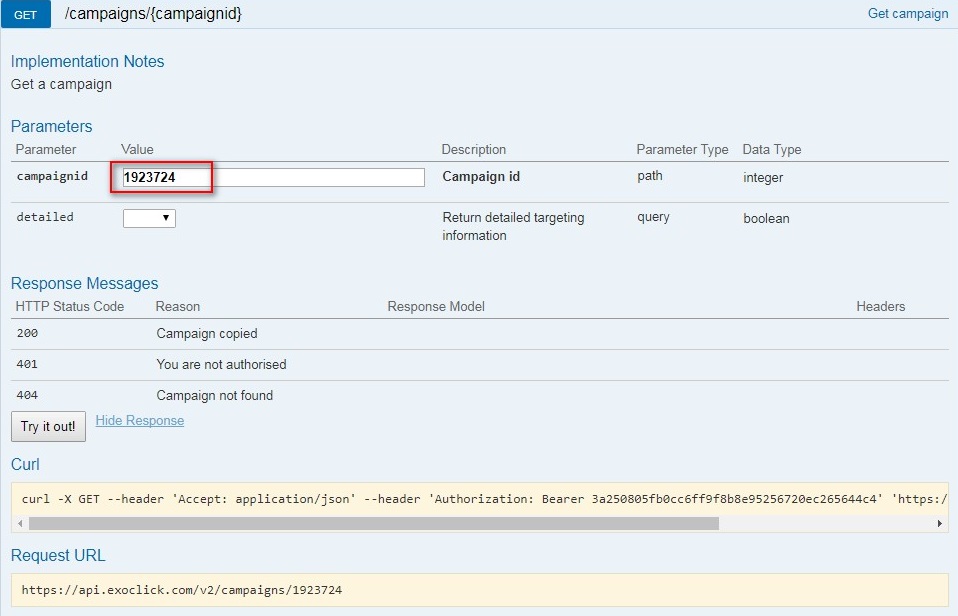
Then click on the Try It Now button, the Response Body will generate the code automatically.
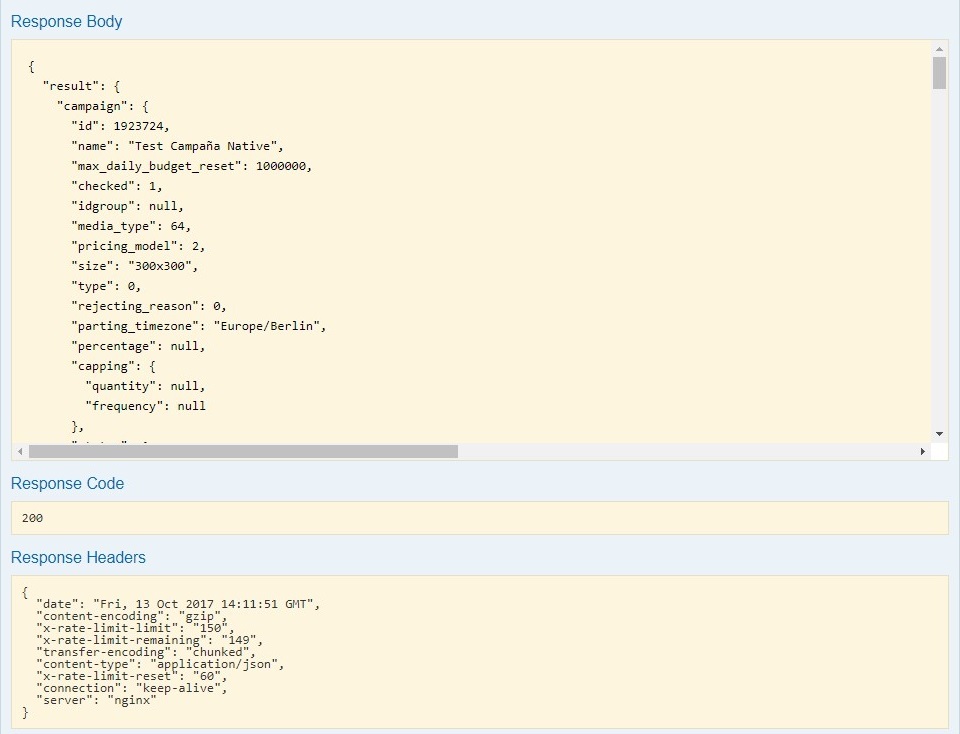
A Response Code of 200 means it is ok to use.
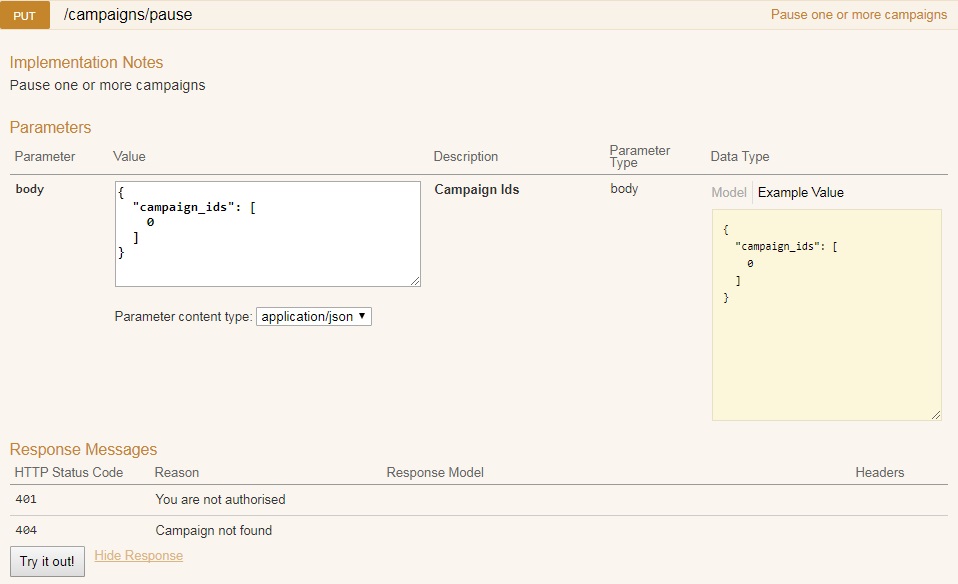
How to pause a campaign
Here is another example. First select the correct function from the Campaigns group:
![]()
Click on Pause one or more campaigns, once opened click on the Example Value, then click on the yellow box, this will automatically paste the json structure into the body box.
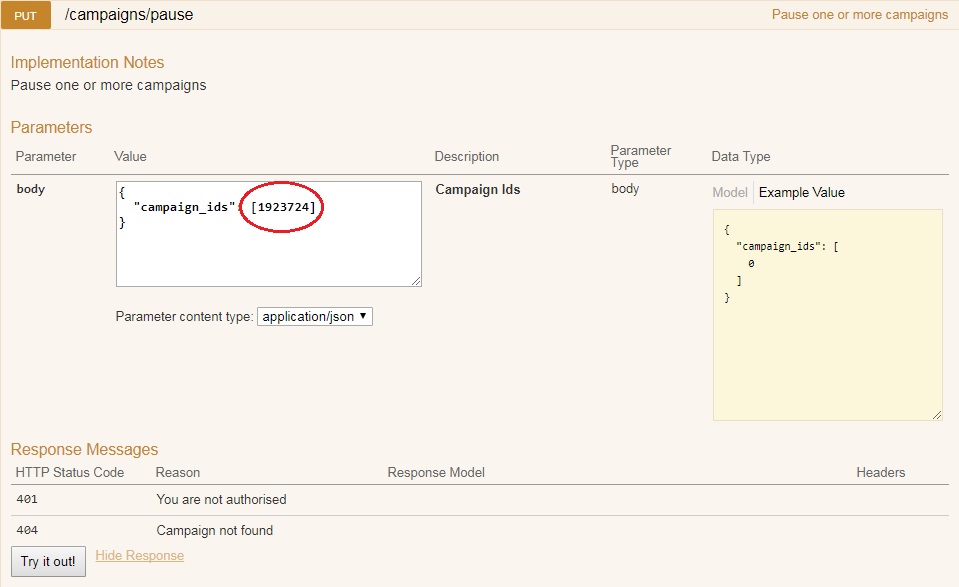
Now the current value is zero, so now change the zero to the CID that you want to put on pause. Then click the Try it out button to generate the code needed.
How to update a campaign’s pricing
Select the correct function:
![]()
Click on Update a campaign, to open the window. Add the CID in the campaign id field then click Example Value, click on the yellow box which will copy the json structure into the body box.
This code contains a few different functions, but we want the campaign pricing code, so delete the part of the code not needed leaving the campaign pricing code in the box, like below:

Now we need to change 2 things in the body box, the model (below is a list of the values related to which pricing model)
CampaignPricing {
model (integer, optional): Campaign pricing model (1: CPC, 2: CPM, 3: CPA, 4: Smart CPM, 5: CPV) = [‘1’, ‘2’, ‘3’, ‘4’, ‘5’],
price (number, optional): Campaign price
}
We are going to stay with CPC so we will leave model at 1
Now we need to change the price from 0 to the price we want, we are going to change this to 200 which means the new price will be 200 cents or 2 euros.
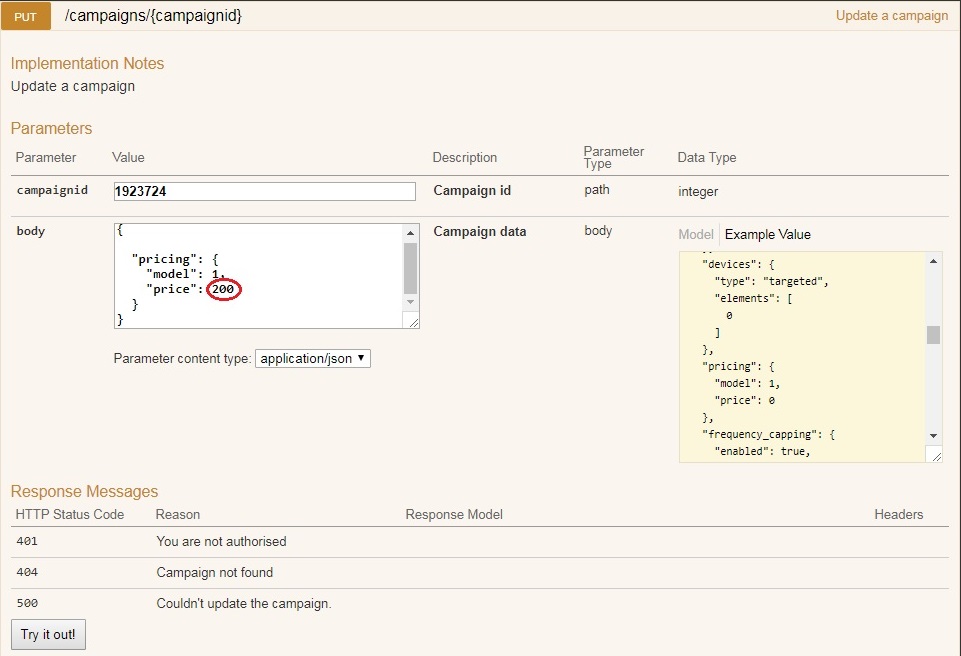
Then simply click the Try it out button to generate the code. Easy!
As you can see the API is packed full of features to automate, the only limit is your imagination to unlock the power of automation.
All of the technical documentation, API manual, API Interface and PHP Client are available from here.
Finally make sure you subscribe to our API newsletter which you find at the bottom of the API interface so you can get the latest news and updates.