Advice: Version 3 update Part 1 Big Data and Perfect Timing

Part 1 : Big Data and Perfect Timing
ExoClick has launched Version 3 of its Admin Panel and it comes with a host of improvements that give both Publishers and Advertisers access to Big Data statistics.
To see an overview of the Version 3 improvements click here
Welcome to Part 1 in our series of tips that will show you how to use the new features in our Version 3 Admin Panel. In this blog post we will be explaining what exactly Big Data is, how fast our statistics are, how you can use the new ‘time’ related data filters to help you evaluate and understand campaign performances better and how to set up timed campaigns using the new Day Parting function.
How is Big Data going to help me?
Put simply Big Data is a log of every single click a person makes on an internet connected device: desktop, mobile, tablet, smart watch, gaming console, Smart TV, etc.
So with an estimated 2.2 million terabytes of new data being created everyday the key to exploiting this data is to create filtering tools that enable marketeers to analyse this data in a useful form, so that they can make informed decisions on where and how to spend their advertising budgets.
Perfect timing
So with all this data being collected every second, it is imperative that marketeers get access to this data in real time. The improvements with Version 3 allow for near real time analysis with data being updated and refreshed every 60 seconds. So why is this so important? Because of this accuracy it allows you to switch the focus of your campaigns instantaneously by reacting to up-to-the-minute data results in the digital market place.
The tools you need to succeed
Version 3 comes with a varied selection of filtering tools so that many different segments of your campaigns can be analysed and evaluated. There are two sets of filter tools that you can use to carry out an analysis utilising the big data you created by your campaign.
Parameters
These let you choose the time period you want to evaluate, choices are:
Period – Today, Yesterday, This Month, Last Month and Custom Dates (setting the dates yourself)
Campaign – Select the campaign you ran or are currently running
Filters
So now you have selected the parameters you can now choose one of the following filters to display your campaign results: Dates, Countries, Variations, Sites, Devices, OS, Browsers, Languages, Categories, Carriers and Hours.
For this blog post we are looking at two specific time related filters: Dates & Hours.
Dates
This filter shows statistics generated each day during the time period you set and they are displayed in a bar graph form.
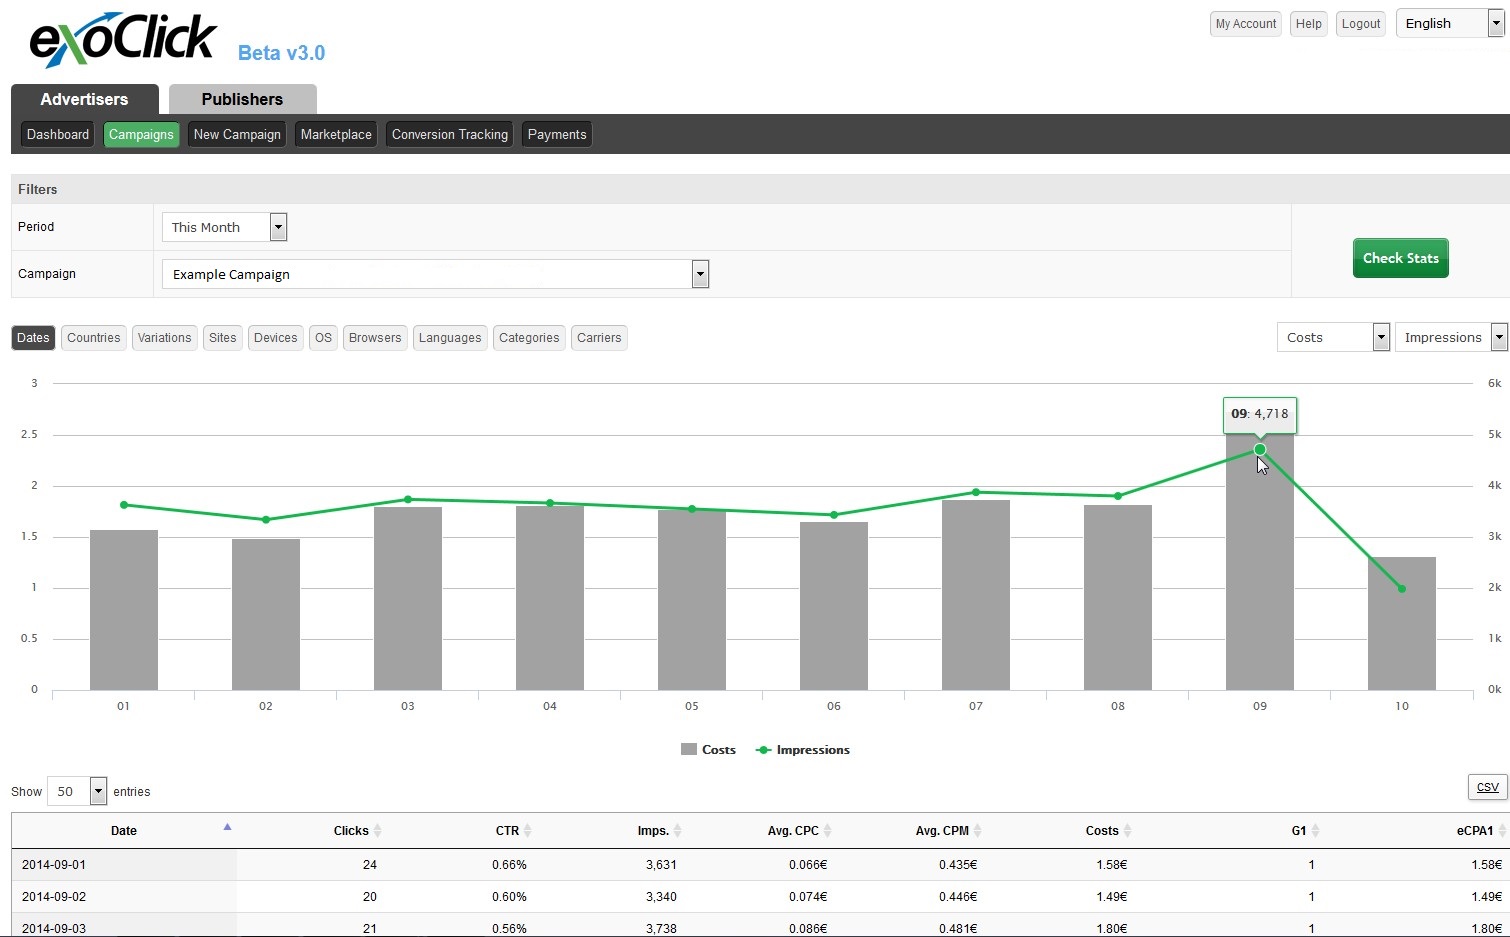
Here you can see your daily statistics including clicks, CTR, impressions, CPC, CPM, CPA, conversions and cost per conversion.
Hours
This filter gives you even more time related details so you can see what is happening hour by hour on the dates you select.
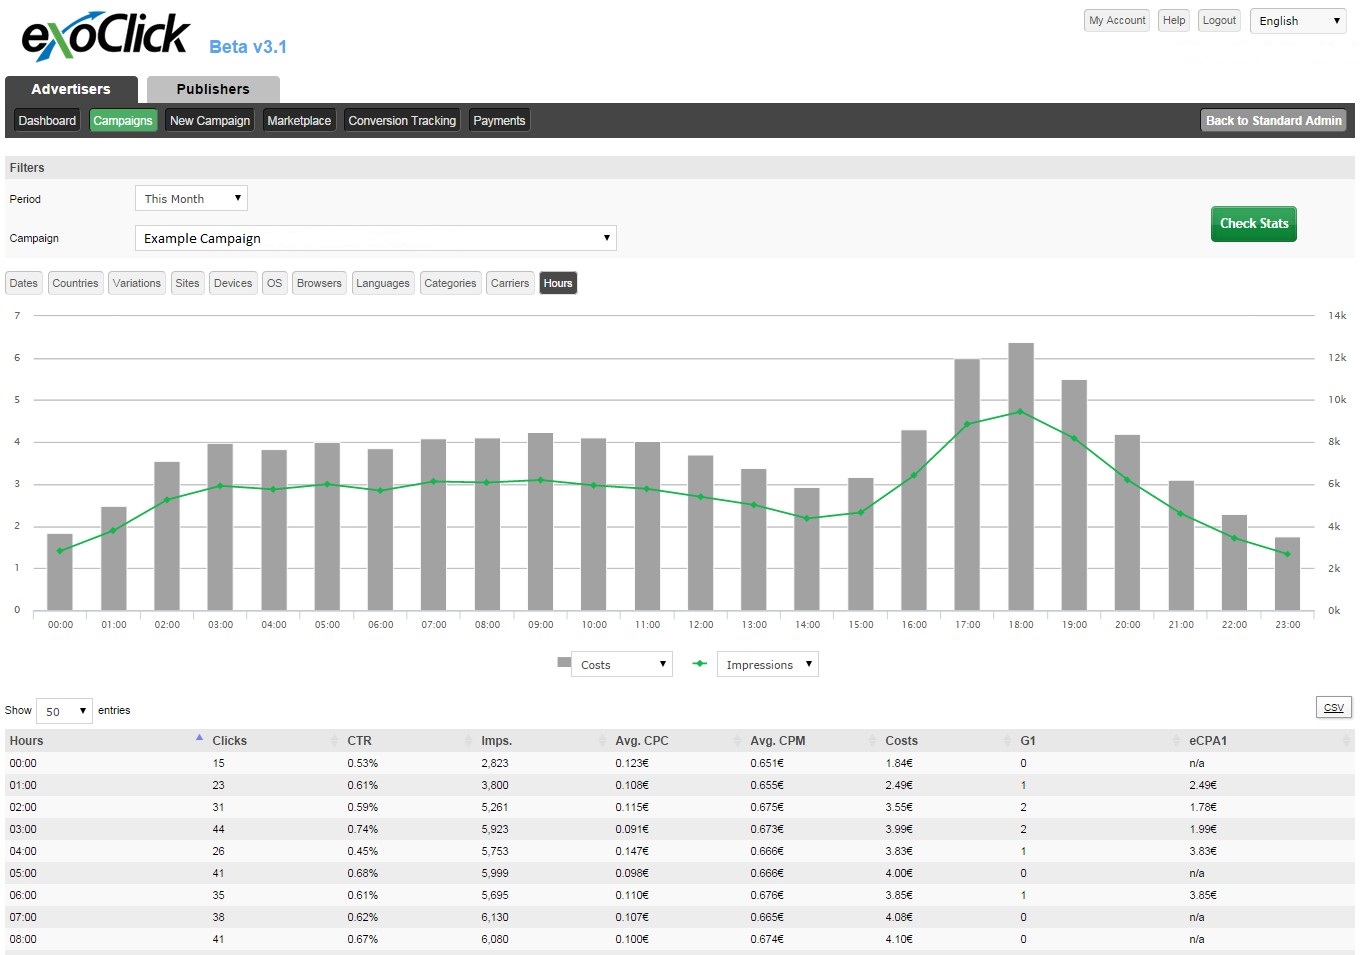
With this filter you can see if your conversions are sensitive to the time of day you run your campaigns, use these statistics to tell you the best time of day to target your audience, then you can start to experiment with the new Day Parting function…
Day Parting
The update also includes a feature for selecting the exact times of when you want your campaigns to run, it’s called Day Parting.
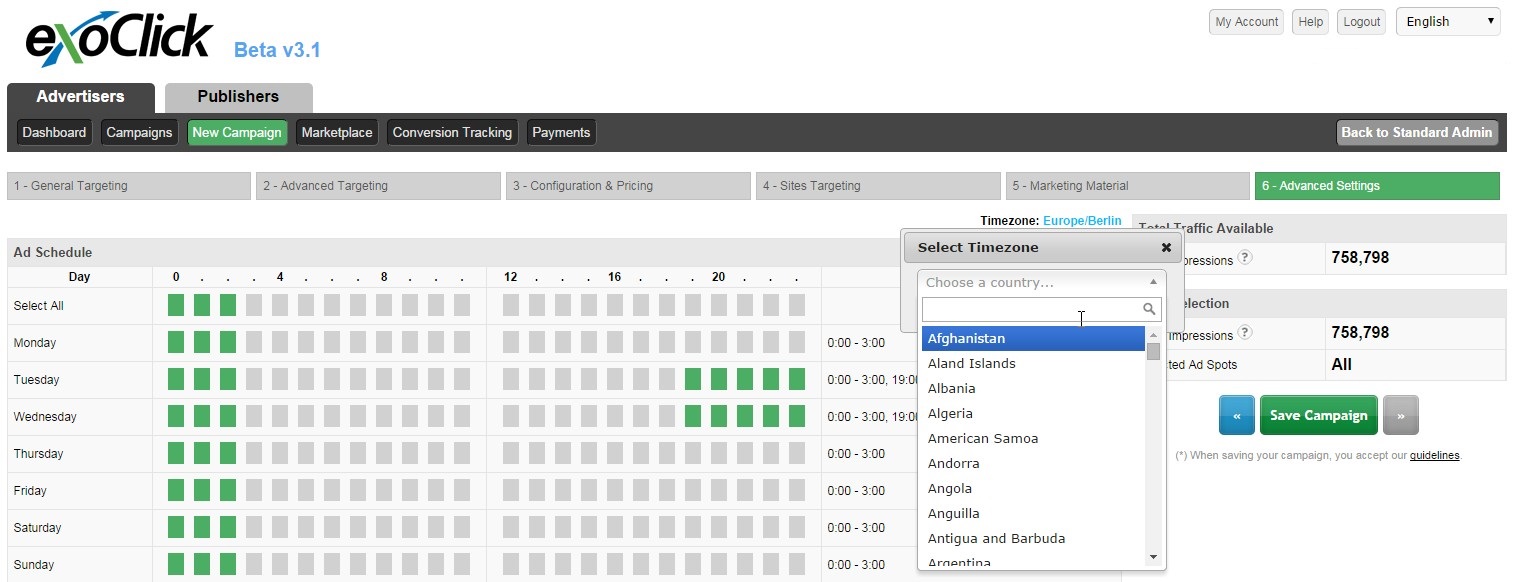
Experiment with these tools to learn more about your target audiences conversion times and fine tune your campaigns accordingly.
Next time
In Part 2 we will look in more detail at the other sub filters now available: Countries, Variations, Sites, Devices, OS, Browsers, Languages, Categories and Carriers and how you can eliminate unprofitable elements to increase your ROI.