How to create a Push Notification ad zone
The Push Notification ad format is now available from ExoClick, in this platform walk through we show you how to create a Push Notification ad zone. But first some useful information:
How do Push Notifications work?
- Users that visit a website can opt in to receive Push Notifications
- All of the website’s opted in users are now available to advertisers
- Users receive Push Notifications via their desktop, tablet or mobile devices, even when they are not browsing the internet
- When users click on the Push Notification they are directed to the advertisers landing page
- Push Notifications are available via CPC or CPM
Push Notifications have many advantages for Publishers
- Further monetisation of users
- Opted in users have a high value
- Google friendly! Can be easily dismissed, option to unsubscribe
- Limited amount of Push Notification messages sent per day, frequency capping of the same offers sent
- Publishers can use their own domain or ExoClicks to collect opt in subscribers and send Push Notifications to
How to set up a Push Notification ad zone
Step 1
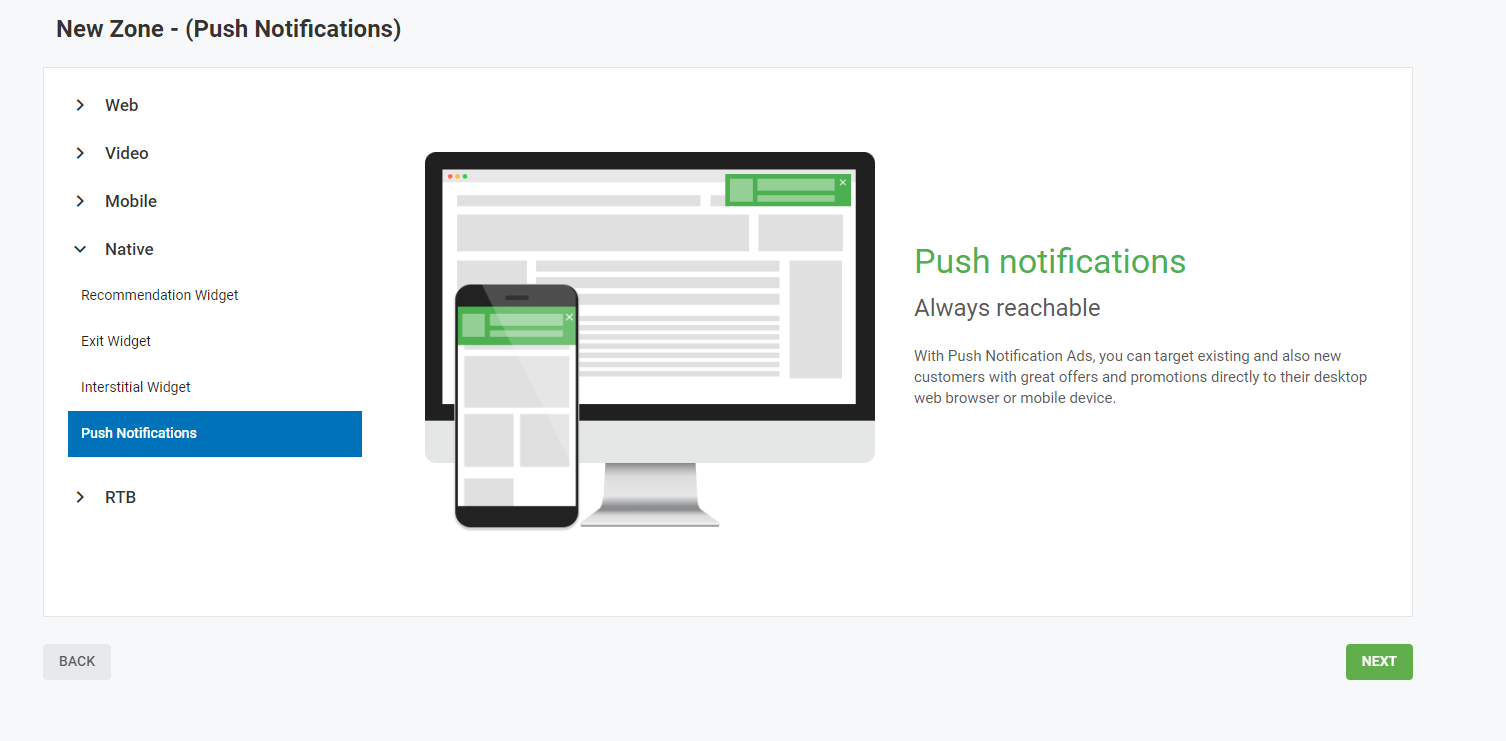
In your admin panel under Publisher go to ‘Sites & Zones’ then click ‘New Zone’. A drop down menu will appear with a list of your websites, select the website you want to enable Push Notifications for. This will open the ad format selection page. Click on the drop down menu ‘Native’, select ‘Push Notifications’ and click ‘Next.’
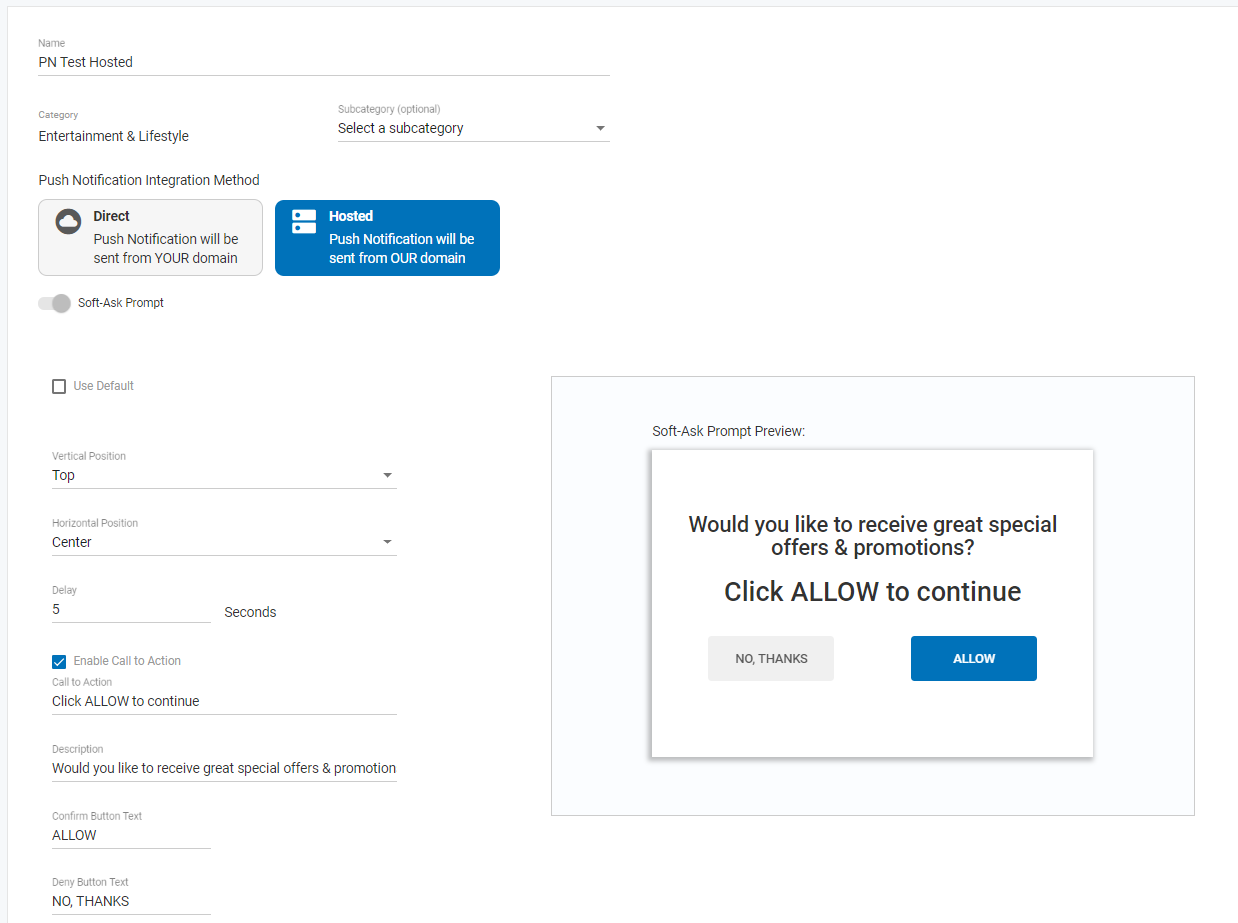
Step 2: Choose the Integration Method
Now you need to decide how you would like to collect opt in users to send Push Notifications to. There are three options:
To use your own domain when the push notifications are sent you can choose between two implementation methods. You can select between ‘Direct’ and ‘Direct with a soft-ask prompt’:
- Direct: This will show one opt in box (Direct) to users on your site. Within the box the user can choose ‘Allow’ or ‘Block’ Push Notifications
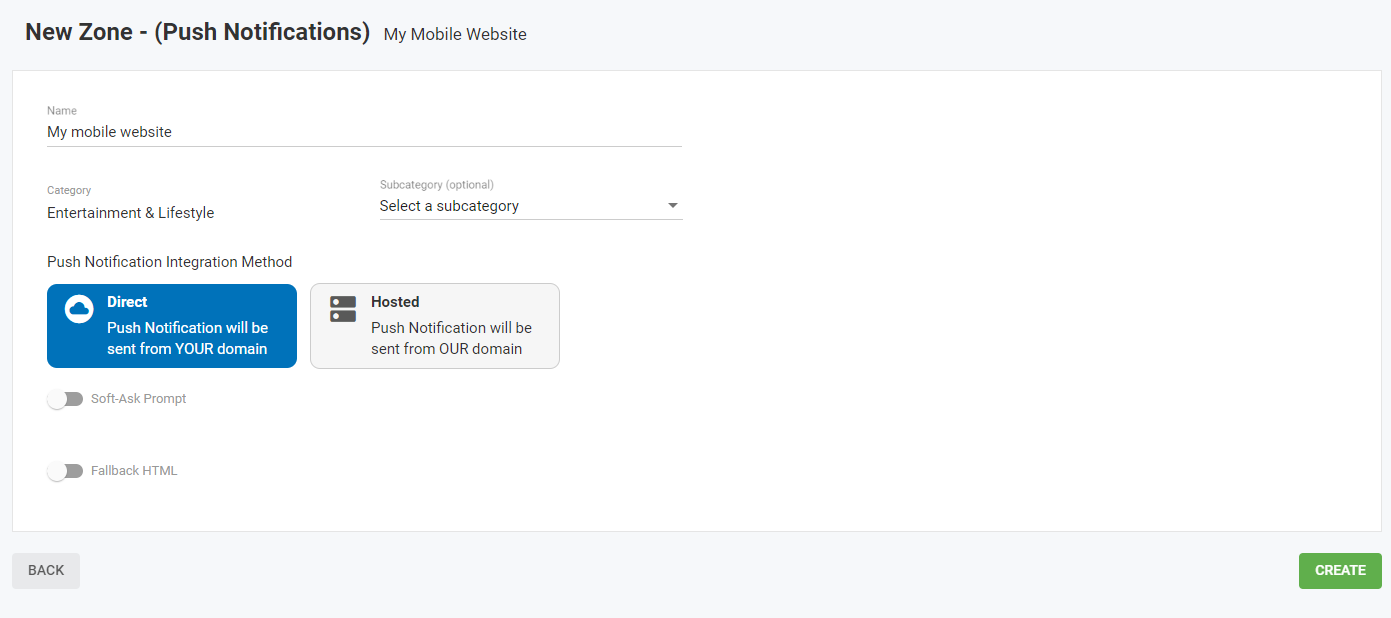
- Direct with a soft-ask prompt: This is a two step process and will show two consecutive opt in boxes on your site. The first (Soft-ask) will ask if the user would like to receive Push Notifications, within the box the user can choose ‘No thanks’ or ‘Allow.’ If the user clicks Allow, a second box (Direct) will appear where the user can choose ‘Allow’ or ‘Block.’ To action this, select Direct and toggle on the Soft-Ask Prompt button
To use ExoClick’s domain there is one implementation method:
- Hosted: This will show only the Soft-ask box on your site, asking if the user would like to receive Push Notifications, within the box the user can choose ‘No thanks’ or ‘Allow.’
Please note: In the Soft-Ask box if a user clicks the ‘No thanks’ box, he will be automatically retargeted again in 2 days time. If you implement the Direct implementation, if the user clicks the ‘Block’ button, he will never be targeted again.
Using your own domain: This will result in a higher subscription rate as direct users of your site are opting in. Your domain will appear in the notification box when push notifications are sent.
Using ExoClick’s domain: This is of benefit to publishers because the user will not associate the Push Notifications with the publisher but with the ExoClick ad network. ExoClick’s domain will appear in the push notification ads. This method also allows you to implement Push Notifications of your site with other networks as well as ExoClick. Read this blog post for a detailed explanation.
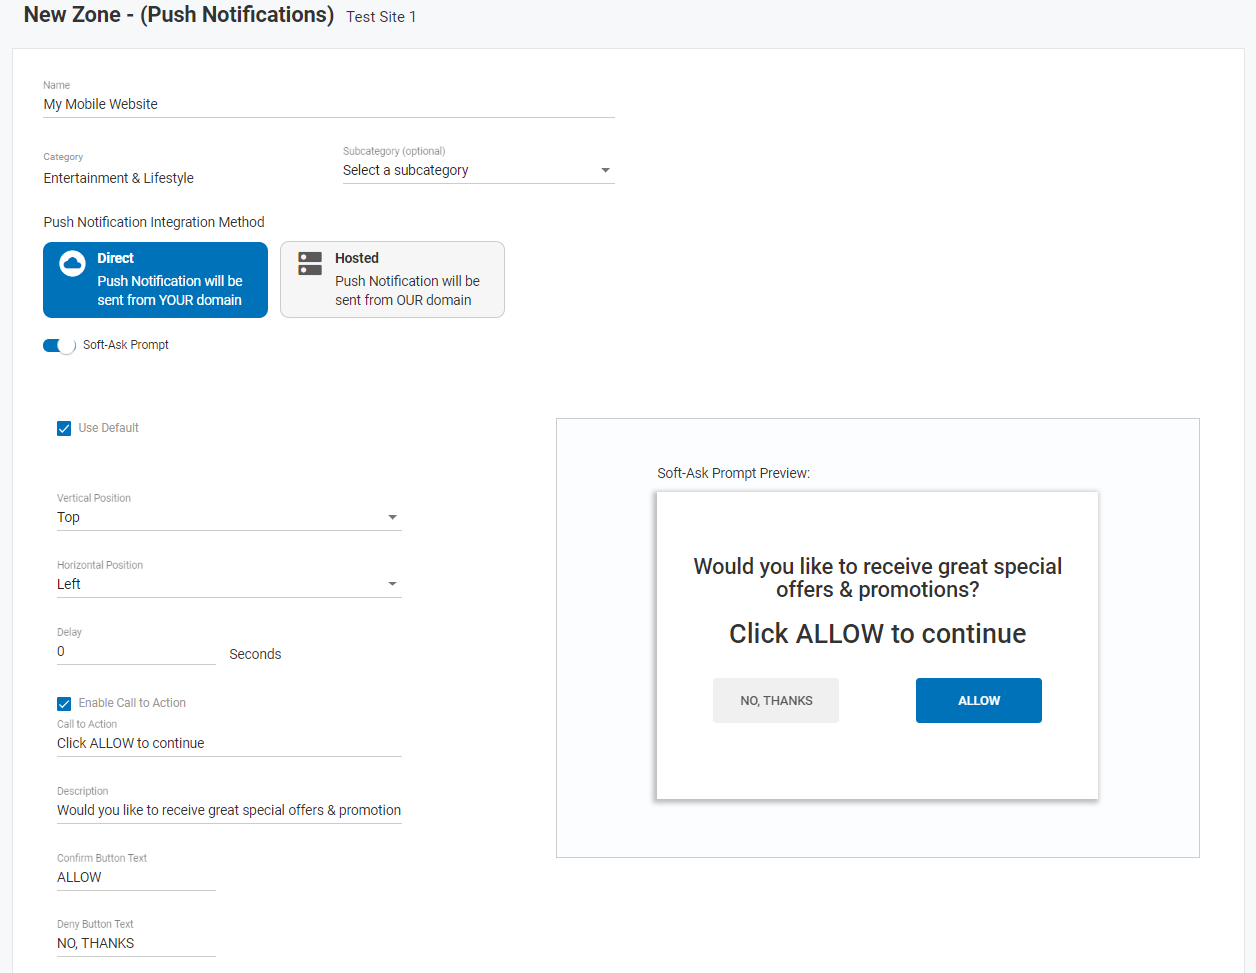
Step 4: Soft-Ask Prompt customisation
When the ‘Use Default’ box is ticked you will see the settings below displayed.
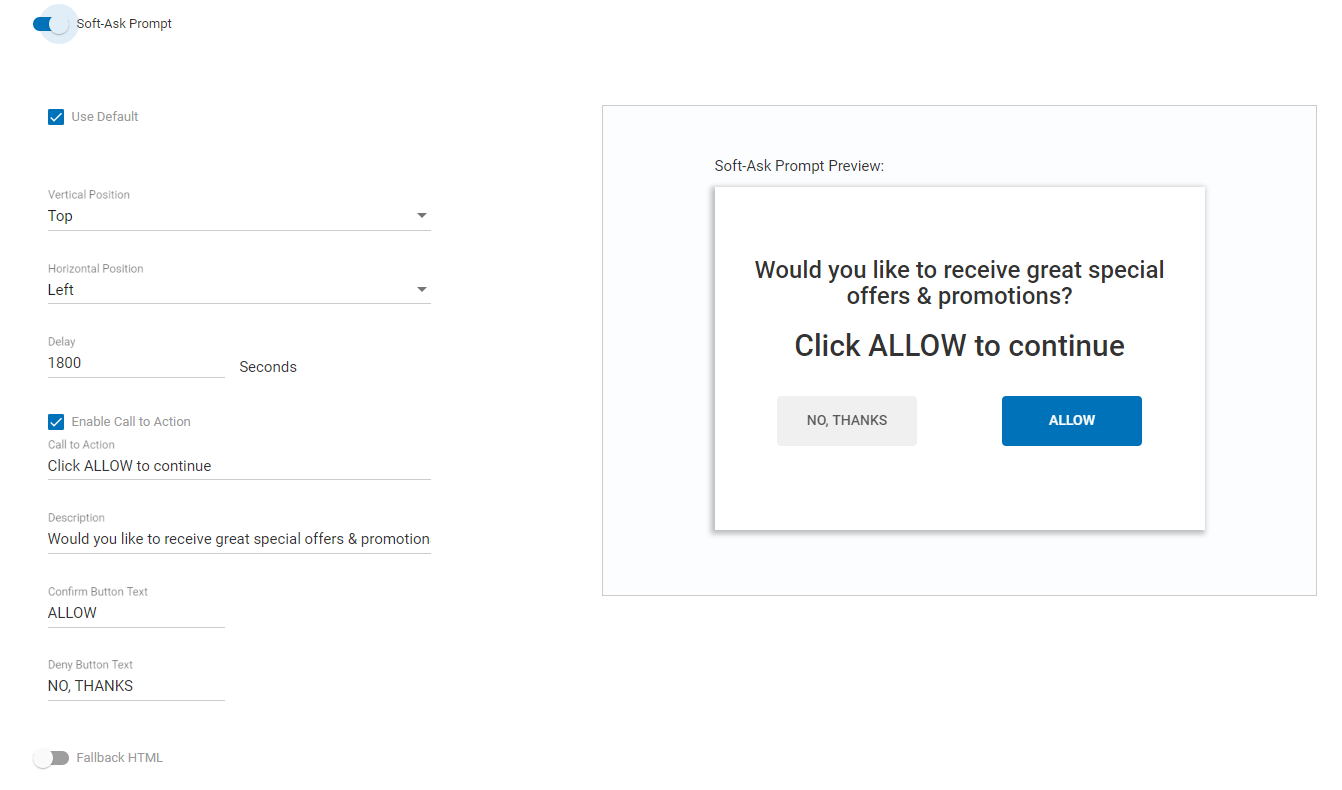
With the ‘Use Default’ box unticked you can customise the following settings:
Position: Here you can choose the position of where the Soft-ask prompt box will appear on the user’s screen, the options are:
Vertical: Top, Middle, Bottom
Horizontal: Left, Centre or Right
Delay: We recommend you set this under 5 seconds so that the user sees the Soft-Ask Prompt box as soon as they arrive at your site
You can also edit the text displayed in the box from the default text provided: Call to action, Description, Confirm button text, Deny button text
Please note: The default texts are hosted on ExoClick’s server and are in 12 languages, English, Spanish, French, German, Italian, Portuguese, Czech, Hungarian, Croatian, Slovak, Russian and Chinese. The texts will automatically display in the language set for the end user’s browser. If you put your own texts in, the Soft-Ask Prompt box will always show in the language you entered and not trigger the default languages we have set.
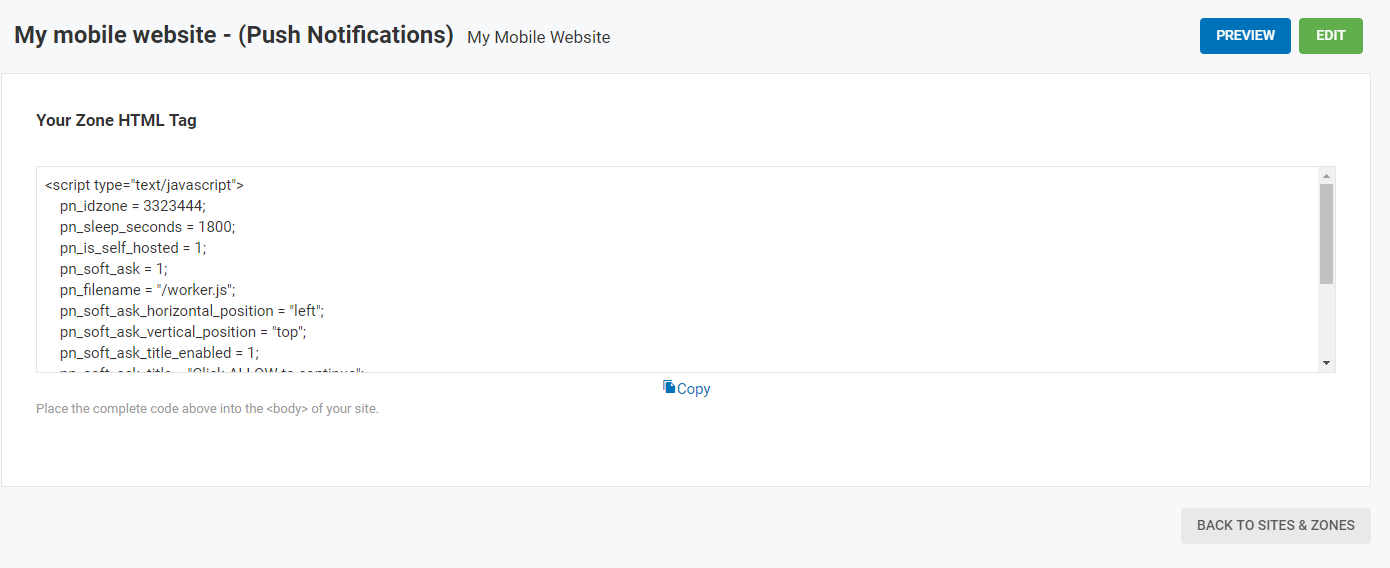
Step 5: Generating the ad zone code
Once you have clicked ‘Create’ the ad zone code is automatically generated for you so that you can cut and paste it into your site.
Step 8: Statistics
Once a subscriber has opted in to receiving Push Notifications there is up to a 2 hour delay before he will receive his first ad.
After that, a subscriber will receive a Push Notification ad every 6 hours, so for example, a user subscribes at 7am:
- Receives first ad between 7am-9am
- Then between 1pm-3pm, 7pm-9pm, 1am-3am
So please bear this in mind when looking at your statistics.
Please note: Push Notifications work on the following browsers/devices:
- Desktop: PC / OS X : Chrome, Firefox, Opera
- Mobile devices : Chrome, Firefox, Opera, Edge, Samsung Internet
- Safari (OS X, iOS) does not allow web push notifications
- Push Notifications won’t work on HTTP sites, only with HTTPS sites.
If you have any problems with setting up your Push Notification ad zone, please contact your Account Manager or a Customer Success Specialist here.