API Master Class #2 Zone Optimization
In part 2 of our 3 part API Masterclass we look at using our platform API for Zone Optimisation. Part 1 covered Data Collection (click here) The aim is for you as an advertiser to use our examples to help get you started using the API and then later, when you feel more confident you can start creating your own examples and tasks.
Zone Optimization allows you to filter your spend for each zone id and then block those zones that are not performing. The purpose is to help you see how your top 10 zones are performing in order to optimise your campaign. Or analyse the bottom 10 zones so you can block under performing zones. This way you can see which of those zones are more profitable for your campaign.
So let’s get started!
Step 1
In order to use ExoClick’s API you must set a Session Token. To set a token, you must have a valid account with the required username and password. The API Token creation is available from the API tab within the Admin Panel.

Step 2
Copy this spreadsheet to your Google Drive and then open it. All of the API coding is done using Google script language, so when you open the spreadsheet simply go to the Tools menu and select Script Editor.
Step 3
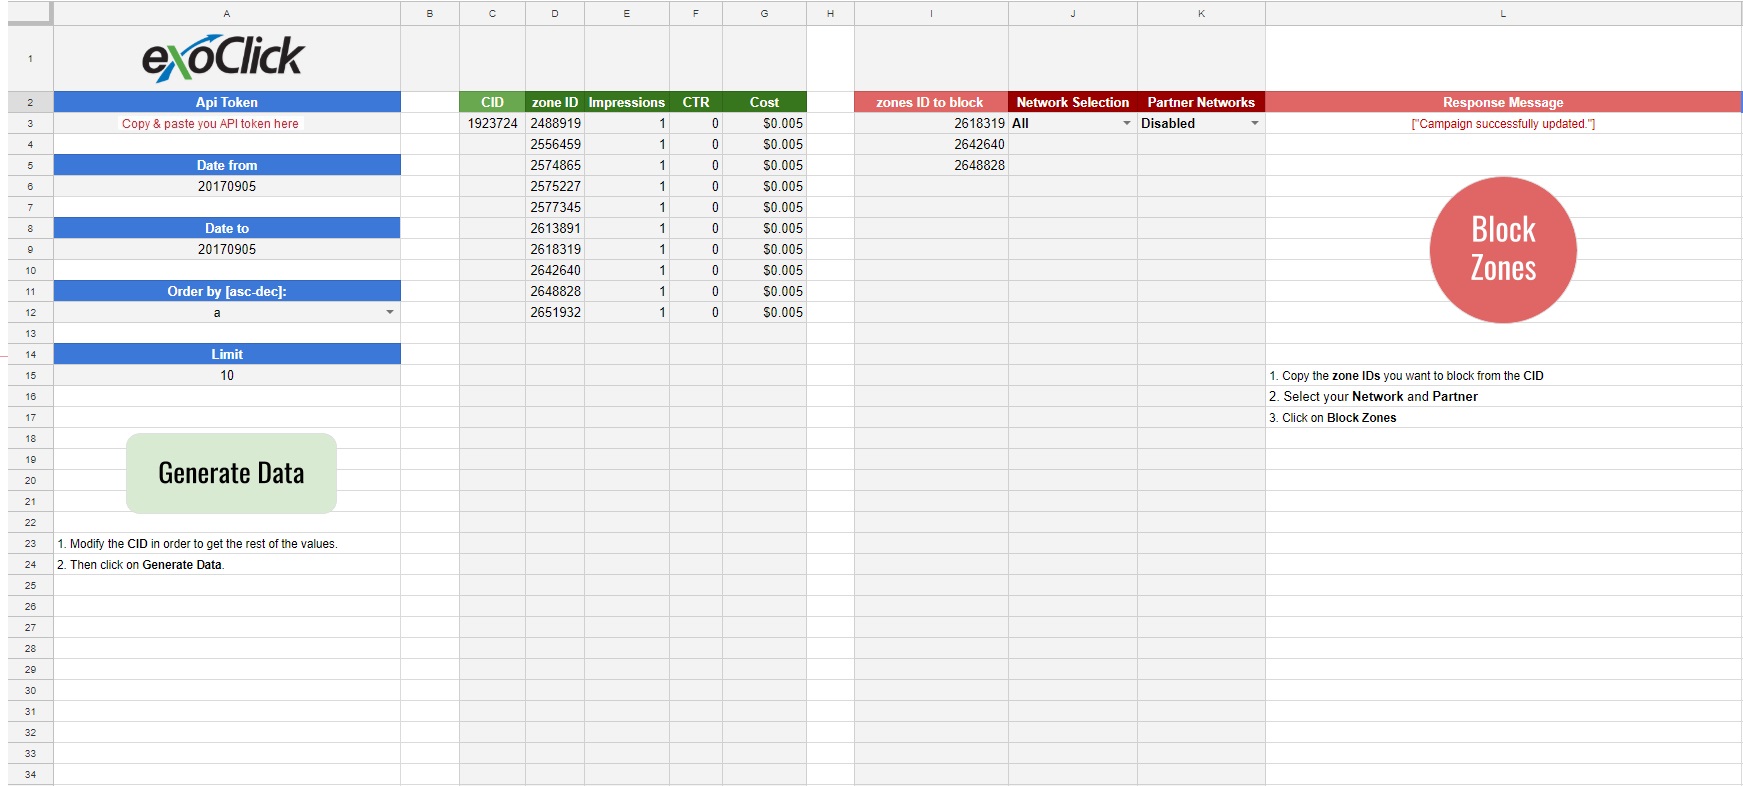
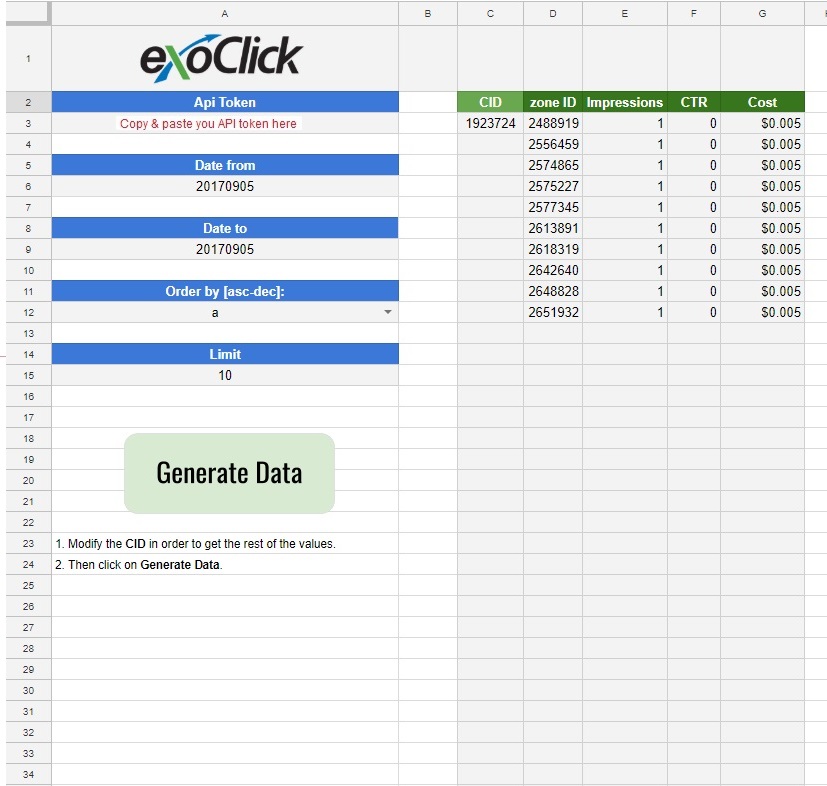
Copy and paste your API token as marked in the diagram below. Here you will see that on the left hand side (green) you can fetch a campaigns data for impressions, CTR and cost: filtered by zone. On the right hand side (red) you can see the section for blocking zones.
Part 1 – Zone Optimization
Step 4
Add the CID in the campaign field. This will allow the system to identify which campaign you want to request and pull the data from.
Step 5
Now set the date parameters by adding them into the date fields (Date from, Date to). This will establish the period from which you wish to request the data.
Step 6
Now you can filter your results by cost using ‘ascending’ or ‘descending’ modes by clicking on the Field Order by [asc-dec]:
Additionally, you can select how many zones you wish to pull data from and display by inserting a number value in the Limit field, the spreadsheet says 10 for 10 zones but you can change this value for however many zones you wish to get data from.
Step 7
Then simply click on the Generate Data button on the spreadsheet and the data will be displayed.
Part 2 – Blocking Zones
Step 8
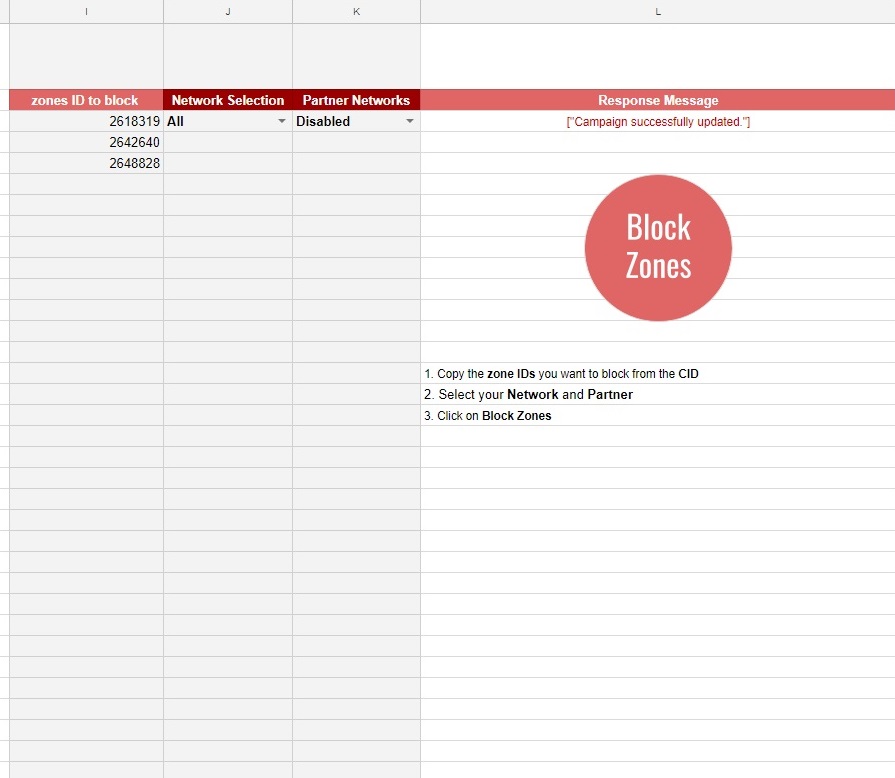
Copy the zones that the API has selected then paste which zones from that list that you want to block in the zone ID to block field.
Step 9
Select from the drop down menu under Network Selection and select: All or RON or Premium or Members area.
Please note:
- All = all ad zones on our network
- RON = All Ad Zones, excluding Premium and Members Area Zones
- Premium: Premium Ad Zones Only
- Members area: Members Area Ad Zones Only
Then select from the drop down menu under Partner Networks select: enabled or disabled.
Please note:
- Enabled: your campaign will receive traffic from Networks and Websites
- Disabled: your campaign will receive traffic from just standard Websites
Step 10
Now you can block the zones from the CID you have used on the spreadsheet by simply clicking on the Block Zones button. If everything is correct the message ‘Campaign successfully updated’ will appear under Response Message.
Please note: Some zones will be just available on specific Network Selections, therefore after pressing the Block Zones button and you receive an error message you should check the network selection of that zone.
And that’s it! Practice with a number of different campaigns and use the insights generated from your data to help you make the right optimisation decisions for targeting and blocking ad zones.