Publisher Guide to Outstream video
With the explosion of TikTok, Reels and the dominance of video traffic online the whole world is embracing video. The Outstream Video ad format is a game changer for publishers because it allows you to put video ads on your site where ever you want!
This guide will explain:
- How is Outstream displayed?
- Outstream benefits to Publishers
- Outstream best practices
- Outstream ad zone creation
How is Outstream displayed?
The Outstream Video ad is shown to the end user during their user journey and is fully responsive, playing on desktop, tablet and mobile.
Publishers set the positioning on their website for when the video ad will trigger. As the user scrolls down the page the ad zone pushes the website’s content down and the Outstream ad starts being visible to the user. This is really eye catching to the end user.
Once 50% of the Outstream ad zone is viewable on screen, the video ad automatically plays on mute, the end user can unmute the video ad. Clicking or tapping the video ad opens the offer’s landing page in a new tab.
As the end user scrolls further down the webpage the video ad will pause, waiting to resume playing when the end user comes back to the content where the Outstream ad is located. This makes this format very user experience friendly.
The ad format is available to bid for on CPM, CPC and CPV.
Benefits to Publishers
- ExoClick’s Outstream Video format is fully compliant with the Coalition for Better Ads featuring a Close ad button on the top right hand corner and on the top left the ad zone features the text ‘Ad by ExoClick.’
- Easy setup. Compared to In-stream video ads, Outstream ads can be considered a plug and play solution with unique trigger positioning on any device to find the perfect revenue generation sweet spot.
- Outstream can be monetized by all Publishers. Create ad zones with video ads within text and thumbnails even if you don’t host video content on your website.
- Effective monetization. Increase your site revenue by up to 9% by implementing Outstream as additional format across the whole inventory. eCPM rates are very competitive in comparison to standard display banner ads.
- Use Outstream below the fold positions when combined with ExoClick’s In-Stream and Video Slider ad formats to boost your video ad zone revenues
Best practices for Publishers
Video or Display? Even though it is a video ad, think of it as a display format to be used in conjunction with your banner ad zones, don’t use it as a replacement for banners but use it as an addition.
Recommended placement: With the In-stream ad format the video ad will always play before an end user sees a video in the player, and the Video Slider ad format will always show to the end user at the bottom right of your webpage when it loads. The Outstream Video format is different, you can place the ad zone anywhere on your website. For the best user experience we recommend that the ad zone is placed below the fold, ideally above or below the mobile middle on Mobile devices and between the content on Desktop devices. This allows the user time to interact with your site’s content first, before seeing the Outstream ad zones. If you also have Video Slider implemented this gives the user time to see the Slider ad first when your page loads, and then as the user scrolls down through your content you can start showing your Outstream ads. In fact Outstream is the perfect format for a Mobile where there is scarce real estate on the screen.
How many Outstream zones to use: You can set up as many Outstream ad zones as you like, however the key here is to test and find the sweet spot by providing the right balance between quality and quantity for best user experience, views and CTR for advertisers.
Outstream ad zone size: The default responsive size is full page width, however in your admin panel you can customise the size of the video that is shown to end users. We recommend that you select a custom size that fits in with the other video player size you have on your site. This will make it appear more like site content to ensure a great user experience and generate more clicks. You can choose a custom width from 200px to 1080px.
Ads By: In your admin panel allow the ‘Ads by Exoclick’ label to inform the user that video content within your feed is an ad. This will make the ad less intrusive and provide better quality clicks to advertisers.
Frequency capping: Use this feature so that the end user doesn’t see the same Outstream ad content too much or this will affect the CTR creating ‘banner blindness.’ So we recommended that frequency capping should only be used when the same ad zone is repeatedly displaying the same ad to a user.
Getting higher eCPM/revenue : Use Keywords and for contextual ads to attract advertisers with specific products or video creatives related to a specific content genre on your webpage. By allowing keyword targeting related to advertiser offers the end user will be more likely to click on the Outstream ad bringing a higher CTR which will make your ad zone more valuable to advertisers giving you higher eCPM.
Creating an Outstream Video ad zone
Step 1: Create a new Ad Zone
Go to the “Sites & Zones” tab and click “New Zone”

There is a drop-down menu listing all your websites, select which one you want to place the Outstream ad zone.
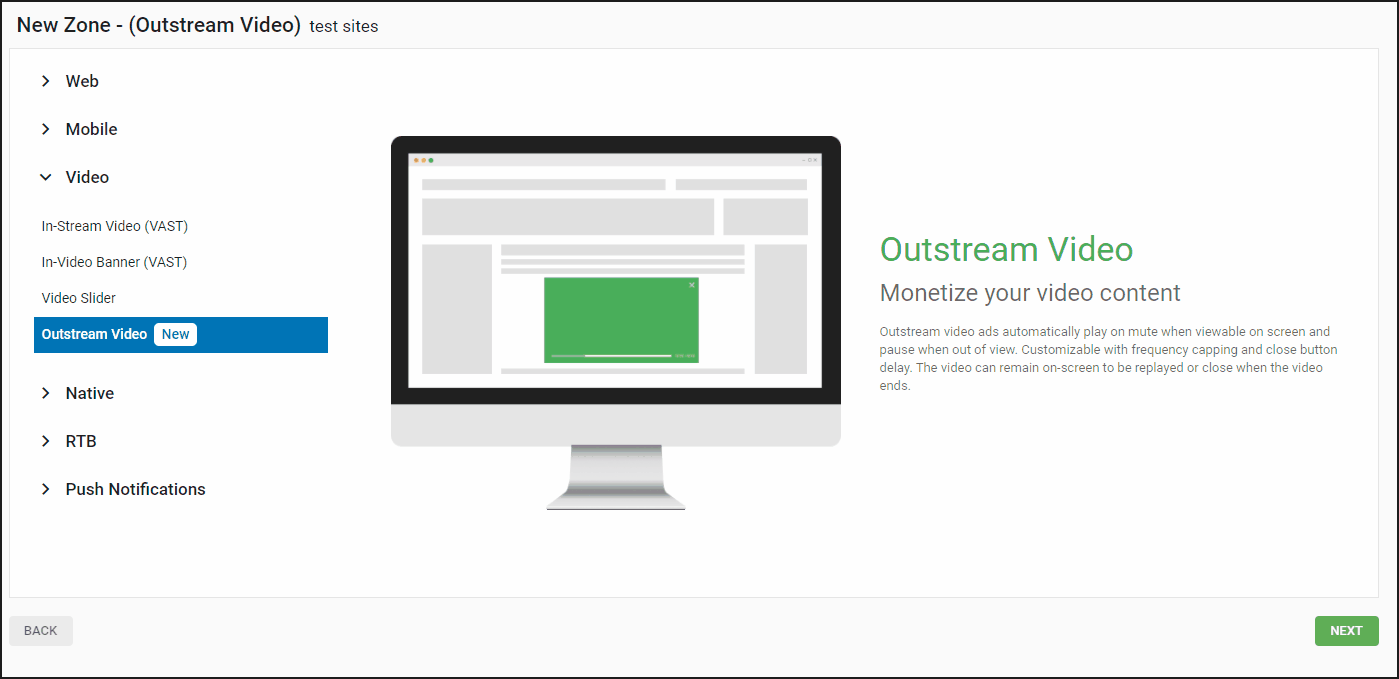
Select the “Video” category and from the drop-down menu select “Outstream” and click “NEXT”
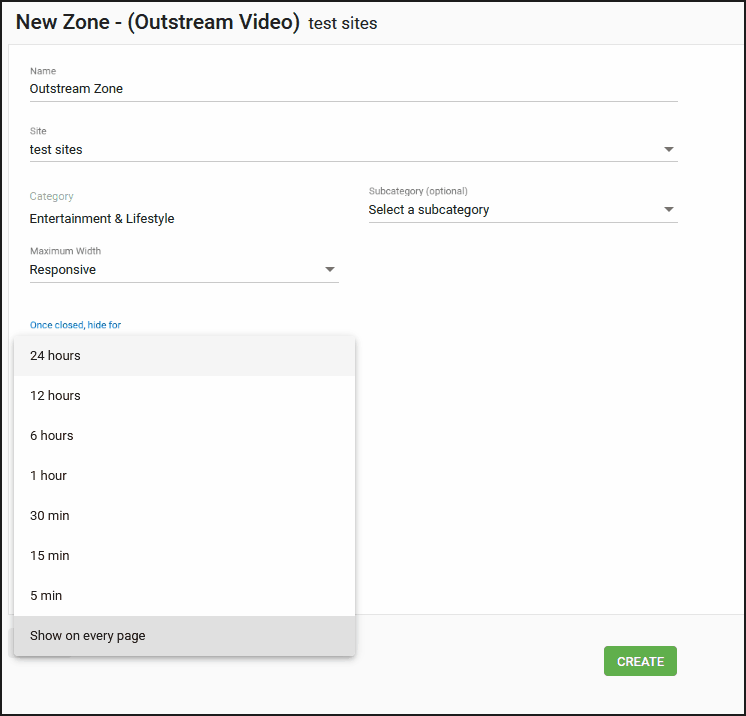
Step 2: Edit the Outstream ad zone features
Name: Personalize the ad zone name to suit your own needs (at least 5 characters long).
Category (default): This is automatically selected based on the category of the site you selected in the previous step.
Subcategory (optional): We recommend that you don’t select a subcategory in order to maximise your earning potential.
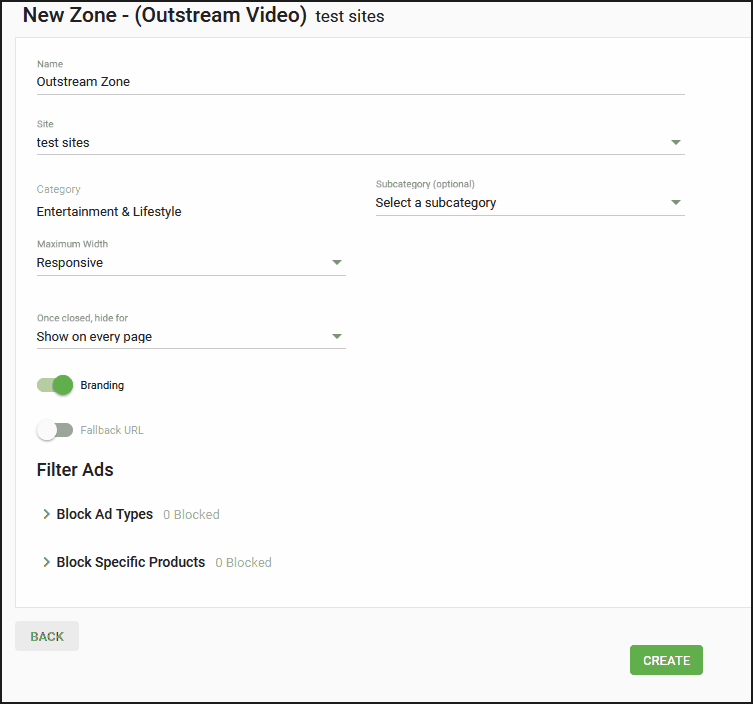
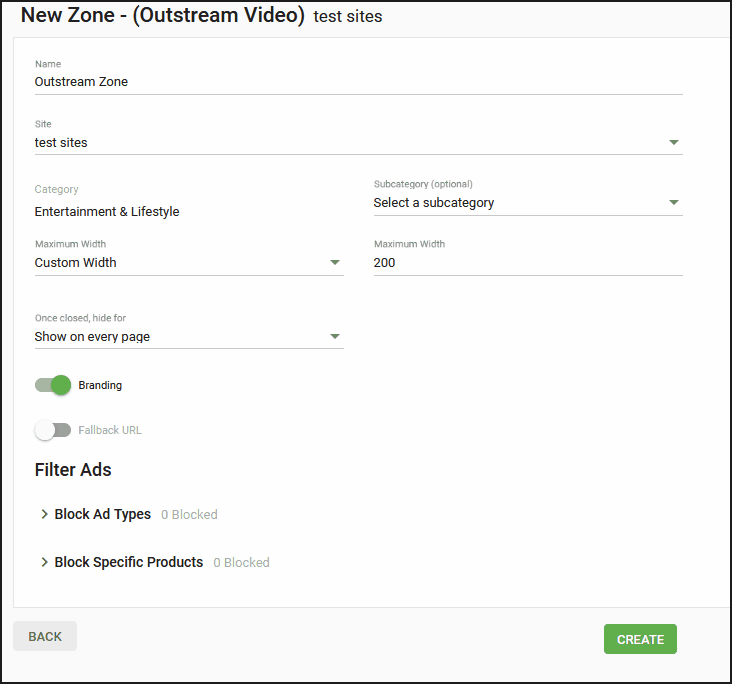
- Maximum Width: This option allows you to choose between a responsive ad or a custom maximum width from 200 – 1080 pixels that matches the container on your site.
- Branding: Enabled by default and will display “Ads by ExoClick.” We recommend keeping this as the default to be Chrome compliant.
- Fallback URL: Switching on this option opens a few more options for your zone. Floor CPM: Here you can set a minimum price (floor) that the ad zone will accept for traffic. Type: A Soft Floor means that we will also run CPC and CPA campaigns that could have an average eCPM higher than your floor CPM, meaning that the floor is not 100% guaranteed. A Hard Floor means we will only run CPM and Smart CPM campaigns on this zone, meaning that the floor is 100% guaranteed.
- Alternative URL: Paste the alternative URL tag to show if the floor is not met.
- Once closed, hide for: This is like frequency capping and you can choose the next time you want to show the ad to each user, Show on every page is the default option which means that the ad will always show.
Step 3: Filter Ads
In this section, you can block by Ad type and/or by Specific Products.
Block Ad type
This allows you to block advertising based on the audience for your traffic. “General” advertising will show an ad that promotes a product suitable for all visitors.
Block Specific Products
You are also able to block specific product types that you don’t want to display in your ad zone. Please note: Blocking too many products could result in no ads showing or reducing your revenues significantly.
Step 4: Integration Snippet Code
Once you’ve selected your Outstream ad zone options a snippet code will be generated which you will need to embed within the <body> tag in your site. The id zone number generated will be a unique number of the ad zone you have created.

Note that you can add tags to this code to ensure you get the right types of advertising, and also use SubIDs to segment your traffic in various ways, such as by traffic source.